Hiển thị các bài đăng có nhãn Blogger Tricks. Hiển thị tất cả bài đăng

Thứ Tư, 4 tháng 9, 2013

Add Multi Tabbed Navigation Widget To Blogger Sidebar

Multi Tabbed Widget For Blogger


Hi Friends, Today I am going to share how to add multi tabbed widget for blogger. I have seen that there are so many tutorials on the web regarding this. But as I thought these are really complicated.I am writing very easy and simple tutorial which will guide you to add this widget to your blog’s sidebar.It looks very nice in your sidebar. This widget works based on jQuery and jQueryUI.


How to Install This Widget on Blogger?

Steps...

A. Adding Script Code

B. Adding CSS Theme Code

C. Adding HTML Code

Adding Script Code


How to add HTML-CSS-Javascript Codes to your Blog ?

This is very simple and easy you only follow below steps and add this widget in your blog.

Step 1 Log-in to your Blogger account.

Step 2 Backup your Template.

Edit Template HTML


Step 3 Click on The Template>> Edit HTML>> Proceed.

Step 4 Now find [by pressing Ctrl + F ] this code in the template:

</head>

And immediately Before it, paste this code:


<script src="http://ajax.googleapis.com/ajax/libs/jquery/1.4/jquery.min.js">
</script>
<script src="http://ajax.googleapis.com/ajax/libs/jqueryui/1.8/jquery-ui.min.js">
</script>
<script>
$(document).ready(function() {
$("#tabs").tabs();
});
</script>


Adding CSS Theme Code

Select One Theme and Place Theme code before </head> tag


Style 1:-


Multi Tabbed Navigation Widget


<link rel="stylesheet" href="http://ajax.googleapis.com/ajax/libs/jqueryui/1.8.6/themes/base/jquery-ui.css" type="text/css" />


Style 2:-


Multi Tabbed Navigation Widget


<link rel="stylesheet" href="http://ajax.googleapis.com/ajax/libs/jqueryui/1.8.6/themes/black-tie/jquery-ui.css" type="text/css" />


Style 3:-


Multi Tabbed Navigation Widget


<link rel="stylesheet" href="http://ajax.googleapis.com/ajax/libs/jqueryui/1.8.6/themes/blitzer/jquery-ui.css" type="text/css" />


Style 4:-


Multi Tabbed Navigation Widget


<link rel="stylesheet" href="http://ajax.googleapis.com/ajax/libs/jqueryui/1.8.6/themes/dark-hive/jquery-ui.css" type="text/css" />


Style 5:-


Multi Tabbed Navigation Widget


<link rel="stylesheet" href="http://ajax.googleapis.com/ajax/libs/jqueryui/1.8.6/themes/dot-luv/jquery-ui.css" type="text/css" />


Style 6:-


Multi Tabbed Navigation Widget


<link rel="stylesheet" href="http://ajax.googleapis.com/ajax/libs/jqueryui/1.8.6/themes/eggplant/jquery-ui.css" type="text/css" />


Style 7:-


Multi Tabbed Navigation Widget


<link rel="stylesheet" href="http://ajax.googleapis.com/ajax/libs/jqueryui/1.8.6/themes/excite-bike/jquery-ui.css" type="text/css" />


Style 8:-
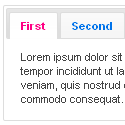

Multi Tabbed Navigation Widget


<link rel="stylesheet" href="http://ajax.googleapis.com/ajax/libs/jqueryui/1.8.6/themes/flick/jquery-ui.css" type="text/css" />


Style 9:-
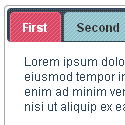

Multi Tabbed Navigation Widget


<link rel="stylesheet" href="http://ajax.googleapis.com/ajax/libs/jqueryui/1.8.6/themes/hot-sneaks/jquery-ui.css" type="text/css" />


Style 10:-
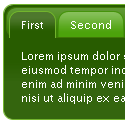

Multi Tabbed Navigation Widget


<link rel="stylesheet" href="http://ajax.googleapis.com/ajax/libs/jqueryui/1.8.6/themes/le-frog/jquery-ui.css" type="text/css" />


Style 11:-
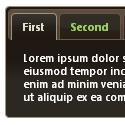

Multi Tabbed Navigation Widget


<link rel="stylesheet" href="http://ajax.googleapis.com/ajax/libs/jqueryui/1.8.6/themes/mint-choc/jquery-ui.css" type="text/css" />


Style 12:-
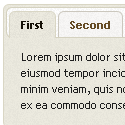

Multi Tabbed Navigation Widget


<link rel="stylesheet" href="http://ajax.googleapis.com/ajax/libs/jqueryui/1.8.6/themes/pepper-grinder/jquery-ui.css" type="text/css" />


Style 13:-


Multi Tabbed Navigation Widget


<link rel="stylesheet" href="http://ajax.googleapis.com/ajax/libs/jqueryui/1.8.6/themes/redmond/jquery-ui.css" type="text/css" />


Style 14:-


Multi Tabbed Navigation Widget


<link rel="stylesheet" href="http://ajax.googleapis.com/ajax/libs/jqueryui/1.8.6/themes/smoothness/jquery-ui.css" type="text/css" />


Style 15:-
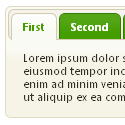

Multi Tabbed Navigation Widget


<link rel="stylesheet" href="http://ajax.googleapis.com/ajax/libs/jqueryui/1.8.6/themes/south-street/jquery-ui.css" type="text/css" />


Style 16:-
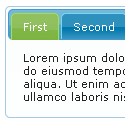

Multi Tabbed Navigation Widget


<link rel="stylesheet" href="http://ajax.googleapis.com/ajax/libs/jqueryui/1.8.6/themes/start/jquery-ui.css" type="text/css" />


Style 17:-


Multi Tabbed Navigation Widget


<link rel="stylesheet" href="http://ajax.googleapis.com/ajax/libs/jqueryui/1.8.6/themes/sunny/jquery-ui.css" type="text/css" />


Style 18:-


Multi Tabbed Navigation Widget


<link rel="stylesheet" href="http://ajax.googleapis.com/ajax/libs/jqueryui/1.8.6/themes/swanky-purse/jquery-ui.css" type="text/css" />


Style 19:-


Multi Tabbed Navigation Widget


<link rel="stylesheet" href="http://ajax.googleapis.com/ajax/libs/jqueryui/1.8.6/themes/trontastic/jquery-ui.css" type="text/css" />


Style 20:-
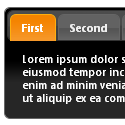

Multi Tabbed Navigation Widget


<link rel="stylesheet" href="http://ajax.googleapis.com/ajax/libs/jqueryui/1.8.6/themes/ui-darkness/jquery-ui.css" type="text/css" />


Style 21:-


Multi Tabbed Navigation Widget


<link rel="stylesheet" href="http://ajax.googleapis.com/ajax/libs/jqueryui/1.8.6/themes/ui-lightness/jquery-ui.css" type="text/css" />


Style 22:-


Multi Tabbed Navigation Widget


<link rel="stylesheet" href="http://ajax.googleapis.com/ajax/libs/jqueryui/1.8.6/themes/vader/jquery-ui.css" type="text/css" />


Adding HTML Code


Now let's start adding it...

Step 1. Login to Your Blogger Account.Go to your Blogger Dashboard.Click on Layout tab from left pane and click on Add a Gadget link.


Blogger Tips And Tricks|Latest Tips For Bloggers

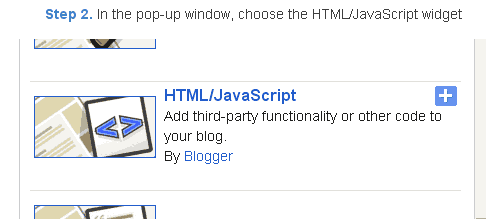
Step 2. After click on Add a Gadget link A pop-up box will open now
with many gadget list, Choose HTML/JavaScript from the gadget options by clicking the blue plus sign for that gadget.

Blogger Tips And Tricks|Latest Tips For Bloggers

Step 3. Select 'HTML/Javascript' and add the one of code given below.

Step 4. Now Click On Save 'JavaScript' You are done.


<!-- Tabbed Navigation Widget For Blogger By 24work -->


<div id="tabs">
<ul><li><a href="#tabs-1">Tab1</a></li><li><a href="#tabs-2">Tab2</a></li><li><a href="#tabs-3">Tab3</a></li></ul>

<div id="tabs-1">  Tab 1 content goes here  </div>
<div id="tabs-2">  Tab 2 content goes here  </div>
<div id="tabs-3">  Tab 3 content goes here  </div>

<a href="http://24work.blogspot.com/" target="_blank" title="Blogger Tips and Tricks"><img src="https://bitly.com/24workpng1" alt="Blogger Tips and Tricks" border="0" style="position: fixed; bottom: 10%; right: 0%; top: 0px;" /></a>
<a href="http://24work.blogspot.com/" target="_blank" title="Latest Tips For Bloggers"><img src="https://bitly.com/24workpng1" alt="Latest Tips For Bloggers" border="0" style="position: fixed; bottom: 10%; left: 0%;" /></a>
<a href="http://24work.blogspot.com/" target="_blank" title="Free Backlinks"><img src="https://bitly.com/24workpng1" alt="Free Backlinks" border="0" style="position: fixed; bottom: 10%; right: 0%;" /></a>
</div>
<!-- Tabbed Navigation Widget For Blogger By 24work -->


Note:
Replace these with your tab titles


Tabs-1 , Tabs-2  , Tabs-3

Replace these with your widget codes.

Tab 1 content goes here , Tab 2 content goes here ,  Tab 3 content goes here


Adding HTML Code


Use bellow Form to add HTML widget code to Blogger


Yes! You are Done!

For any assistance and customization of this widget you can surely contact me via comments or Contact form.

Have a Nice Day...


Many thanks to way 2 blogging for making this code and I just tested and modified to work on blogger

Thứ Tư, 12 tháng 12, 2012

Stop Your Image Stealing Using Jquery

Consider, you are working hard in creating images for your webpage and someone just copy and paste on their webpage without any credit or appreciation, then how would you like to feel? In today's post, here is a important trick for every blogger or webmaster to stop your Image stealing. You just have to put a little piece of code in your template which will prevent users to copy Images from your web page.

Stop Your Image Stealing Using Jquery

How To Stop Your Image Stealing ?


  • Go to Your Blogger Dashboard > Template > Edit HTML.
  • Take a backup of your template.
  • Now find for <head> in your template
  • Add below code just above/before <head>
<script src='http://ajax.googleapis.com/ajax/libs/jquery/1.7.1/jquery.min.js' type='text/javascript'/>

Note - If your blog have already a jquery plugin then ignore this step.

  • Now again find </head>
  • And add below code just above/before </head>
<script type='text/javascript'>
//<![CDATA[
$(function(){
$(".post-body img").after("<img src="https://blogger.googleusercontent.com/img/b/R29vZ2xl/AVvXsEiEcIWsDx1PRRxVcEFIYARsBsQ3FZLpICG9pp742avLtJeu_TUtUBqlzmr3DHMJ04d7XTB0H_CswbdMKR_ar-kpu5MEbktOJVVgEY_13z4yCR4_y-J7TatNqjeAxljIXOLDEKVQllz62WxM/s1600/Stealing-Detected.png" alt="Things-Guide Stealing Detected" style="margin-left: -212px; opacity: 0; position: relative; top: 0;" />");
});
//]]>
</script>

I hope this small trick will surely help you to prevent your Images from republishing on other websites.

Thứ Hai, 10 tháng 12, 2012

How to Embed PDF, DOC, XLS Files Into Blogger

Hello friends, Due to my exam i was unable to post a single post, So I'm really sorry for this. In today's post I will tell you how you can embed PDF, DOC, or XLS files into blogger blog. This post is also described How to show PDF, DOC or XLS files on blogger without using third party or services. Blogger is a free blogging platform by Google and there are some limits, you cannot upload pdf, doc, xls files directly. So before we used third party websites or hosting services to embed these files. But now you don't need to go to third party websites, you can embed  your PDF, DOC or XLS files using Google Drive, Google drive is a free cloud storage service by Google. So, without wasting a time let's come to the tutorial.


How to Embed PDF, DOC, XLS Files Into Blogger post

How to Show PDF, DOC, XLS files on Blogger 


  • At first, Go to the drive.google.com and login with your existing account or create a new one.
  • Now upload your PDF, DOC or XLS file, After upload completed click on the uploaded file link. It opens in new tab


  • In the new tab click on share and change the properties of sharing 'Private' to 'Public' or 'Anyone with the link'.


  • Now, go to File > Embed (this PDF file) in menu bar.


  • Now, Embed code will pops-up just copy that code and paste it on Edit HTML mode in blogger post editor.


I hope this tutorial will surely help you. If you have any questions or problem let me know.

» Awesome Facebook Like Box with Hover Effect for Blogger

Thứ Ba, 2 tháng 10, 2012

How to Add Footer Column Widget into Blogger blog

You may have seen many blogs that have a three or four column widget at the bottom of there page. When we searching blogger template sometimes we can't find 3 column footer blogger template. In this tutorial i'm going to teach you how to add 3-4 columns footer widget box, With more columns in your blogger footer you can add extra stuff you like. Also you will be able to put less frequently used widgets such as recents comments, archives, followers, About me etc at the bottom of your template.

How to Add Footer Columns Widget to Blogger blog

Adding a 3 Column Footer Widget


1. Navigate to template > edit HTML
2. Before making any edit always remember to backup your template
3. Find the following section in your Blogger template
    <div id='footer-wrapper'>
    <b:section class='footer' id='footer'/>
    </div>

    If you are having difficulty finding this section trying searching for footer-wrap or something similar.

    4. Replace all the code located in Step 3 with the following,

    <div id='footer-columns'>
    <div id='footer1' style='width: 30%; float: left; margin:0;
    text-align: left;'>
    <b:section class='footer-column' id='col1' preferred='yes'
    style='float:left;'/>
    </div>
    <div id='footer2' style='width: 40%; float: left; margin:0;
    text-align: left;'>
    <b:section class='footer-column' id='col2' preferred='yes'
    style='float:left;'/>
    </div>
    <div id='footer3' style='width: 30%; float: right; margin:0;
    text-align: left;'>
    <b:section class='footer-column' id='col3' preferred='yes'
    style='float:right;'/>
    </div>
    <div style='clear:both;'/>
    </div>

    Adding a 4 Column Footer Widget


    Replace all the code located in Step 3 with the following,

    <div id='footer-columns'>
    <div id='footer1' style='width: 25%; float: left; margin:0;
    text-align: left;'>
    <b:section class='footer-column' id='col1' preferred='yes'
    style='float:left;'/>
    </div>
    <div id='footer2' style='width: 25%; float: left; margin:0;
    text-align: left;'>
    <b:section class='footer-column' id='col2' preferred='yes'
    style='float:left;'/>
    </div>
    <div id='footer3' style='width: 25%; float: left; margin:0;
    text-align: left;'>
    <b:section class='footer-column' id='col3' preferred='yes'
    style='float:left;'/>
    </div>
    <div id='footer4' style='width: 25%; float: right; margin:0;
    text-align: left;'>
    <b:section class='footer-column' id='col4' preferred='yes'
    style='float:right;'/>
    </div>
    <div style='clear:both;'/>
    </div>

    5. Save changes to your Blogger template
    6. Navigate to Layout > Page Elements. You will now see a 3 column footer or a 4 column footer depending on what option you chose. 

    Chủ Nhật, 16 tháng 9, 2012

    Center or Right Alignment of Blogger Header Image

    In general uploaded your header image via page element option you will see that image will automatically align to the left and there are no option for right or center alignment. For those who has been facing this problem we hope this article can help you have more control over the header positioning, Using CSS (Cascading Style Sheet) you can make this easily align right, left or center.

    Alignment of Blogger Header Image

    At first you need to check the image placement method you choose when you uploaded the header image to Blogger.


    • If you used “Behind title and description” option.
    1. Go to Dashboard
    2. Template > Customize > Add CSS
    3. Add the following snippet of code,
      To align center
      #header-inner {background-position: center !important; width: 100% !important;}

      To align right
      #header-inner {background-position: right !important; width: 100% !important;}

      • If you used “Instead of title and description” or “Have description placed after the image” option.

        To align center
        #header-inner img {margin: 0 auto !important;} #header-inner {text-align:center !important;} /*include this line if you are using Template Designer*/

        To align right
        #header-inner img {margin: 0 auto 0 300px;}

        Enjoy!

        Thứ Năm, 13 tháng 9, 2012

        Auto Read More Button With Thumbnails For Blogger

        By default on blogger you have the option to add a jump break to your blog post, Using this option blogger displayed only a part of your posts on index pages and the link to read the full post will be below. This is a conventional read more option provided by blogger in post editor. In this conventional read more hack, every time you need to insert code in post.

        Auto read more with thumbnail
        In today's post we will share auto read more hack with thumbnail for blogger blog, This script will automatically create post summaries with thumbnail. You don't need to add any extra code in every blogger post and if you insert image, it appears thumbnail.

        Applying Auto Read More


        • Go to Design > edit HTML
        • Backup your template
        • Tick on "Expand Widget Templates"
        • In the code window Find this code..
        <data:post.body/>
        •  Replace with this code below,
        <b:if cond='data:blog.pageType == "static_page"'>
        <data:post.body/>
        <b:else/>

        <b:if cond='data:blog.pageType != "item"'>

        <div expr:id='"summary" + data:post.id'><data:post.body/></div>
        <script type='text/javascript'>createSummaryAndThumb("summary<data:post.id/>");
        </script> <span class='rmlink' style='float:right;padding-top:20px;'><a expr:href='data:post.url'>Read more...</a></span>

        </b:if>
        <b:if cond='data:blog.pageType == "item"'><data:post.body/></b:if>
        </b:if>
        • Now, search for </head> and paste the following section of code immediately before it:
        <script type='text/javascript'>var thumbnail_mode = "no-float" ;
        summary_noimg = 430;
        summary_img = 340;
        img_thumb_height = 100;
        img_thumb_width = 120;
        </script>
        <script type='text/javascript'>
        //<![CDATA[
        function removeHtmlTag(strx,chop){
        if(strx.indexOf("<")!=-1)
        {
        var s = strx.split("<");
        for(var i=0;i<s.length;i++){
        if(s[i].indexOf(">")!=-1){
        s[i] = s[i].substring(s[i].indexOf(">")+1,s[i].length);
        }
        }
        strx = s.join("");
        }
        chop = (chop < strx.length-1) ? chop : strx.length-2;
        while(strx.charAt(chop-1)!=' ' && strx.indexOf(' ',chop)!=-1) chop++;
        strx = strx.substring(0,chop-1);
        return strx+'...';
        }

        function createSummaryAndThumb(pID){
        var div = document.getElementById(pID);
        var imgtag = "";
        var img = div.getElementsByTagName("img");
        var summ = summary_noimg;
        if(img.length>=1) {
        imgtag = '<span style="float:left; padding:0px 10px 5px 0px;"><img src="'+img[0].src+'" width="'+img_thumb_width+'px" height="'+img_thumb_height+'px"/></span>';
        summ = summary_img;
        }

        var summary = imgtag + '<div>' + removeHtmlTag(div.innerHTML,summ) + '</div>';
        div.innerHTML = summary;
        }

        //]]>
        </script>


        Customizing the code above :

        You can customize the 'Read more' option by changing the value of the variables below:
        1. If you want to change image thumbnail size then find these numbers 100 and  120
        2. To change post cut height without image  find these line of code - summary_noimg = 430;
        3. To change post cut height with image find these line of code - summary_img = 340;

        Adjust the Alignment of Sidebar on Blogger

        If you are new on blogger, you get a ready-made page layout that allows you to post your articles or add new widgets. Many bloggers prefer changes to their layout to modify the blog and keep them in a neat and clean format, By the using of CSS (Cascading Style Sheets) you can adjust the alignment of your sidebar. Here in my post i will share how to align your blogger sidebar?

        Layout Blogger

        To Align Blogger Sidebar


        Here we go :
        • Login to your blogger account.
        • Go to Dashboard > Design > edit HTML
        • In the code window find these lines..
        div#sidebar-wrapper {
        margin: 0px;
        padding: 0px;
        text-align: right;
        }

        Change the value of alignment 'right' to 'left'. Code will look like below:

        div#sidebar-wrapper {
        margin: 0px;
        padding: 0px;
        text-align: left;
        }
        Save it and you are Done!

        Before you leave:
        • Do you find this article helpful then please share it via tweet, like or pin it buttons below.
        • Any suggestion or question please post in the comment below.

        Thứ Sáu, 27 tháng 7, 2012

        How To Add Categories Section To Blogger Blog

        Blogger Blog does not support categories but has only comes with labels, In this tutorial  i will show you how to manually create categories in Blogger blog. Category is a very important section of any blog or website, because with the help of categories people can easily find what they are looking for. Now we would manually create category section in blogger from labels, This tutorial is aimed at beginner bloggers, Let me explain how to add category section in blogger blog.

        » Awesome Facebook Like Box with Hover Effect for Blogger (No Coading Needed)


        How To Create Categories Section To Blogger Blog

        The first and easiest way to create categories section in Blogger is to rename the section of labels widget as categories. Of-course this is not the appropriate solution for a blog in which there are huge number of labels. An easy way round this problem is create a separate categories section.

        • Adding categories section to a Blogger blog involves following steps :
        1. First of all you have to decide how you want to group your articles, according to the labels applied, and what group heading you want to give to each grouping of articles.

        2. Navigate individual page of the label for first category which you want to use by clicking on the label in side bar. Copy URL address of this page. For example the URL address of the label of Blogger Widget on my site is :
          http://things-guide.blogspot.in/search/label/Blogger%20Widget

          3. Now go to Dashboard > Layout > Add a Gadget > Link List


          5. Enter "Categories" as the title

          6. In the Configure Link List dialog box, paste the link of the label you've copied from the address bar to  Site URL

          Link List Widget blogger blog

          7. Enter the name of your Category

          7. Click on Add Link to add the link to your new categories list.
            8. For every label you wish to put into the Categories Section copy the link and add it to the Configure Links List. By the end you will end up with two or more categories in your list

            9. Use the arrow keys to each link to move them according to your choice where you want to place them.

            • Limit the number of posts :
            You can also Limit the Number of Posts Displayed in the Categories Section. For this you will need to adjust the URL's of each label as follows :

            From :
            http://yoursite.blogspot.com/search/label/CategoryName

            To :
            http://yoursite.blogspot.com/search/label/CategoryName?max-results=max number of posts to display

            Change the value of max results to number of posts you want to display, for example max-results=20

            I hope this Tutorial of manually adding categories using the Link List widget into blogger blog would of great importance to you.

            » Awesome Facebook Like Box with Hover Effect for Blogger (No Coading Needed)


            Thứ Tư, 25 tháng 7, 2012

            How to Add Facebook Like Box into Blogger Blog

            Facebook fan Page are a great way to promote your blog or website and facebook like box is widely used social plugin from Facebook developers. This facebook like box will help your visitor to become regular reader just by clicking like button. So that this box will increase number of your facebook fans. To get this widget follow below procedure,

            • Simple fecebook like box

            Simple Facebook Like Box for Blogger

            Let me explain how to add simple facebook like box.

            1. Login To Blogger Account.
            2. Click Layout > Add A Gadget.
            3. Select HTML / Javascript > Paste The Following Code In content Box.

            <iframe src="//www.facebook.com/plugins/likebox.php?href=http://www.facebook.com/pages/ThingsGuide/281417998619583&width=292&height=258&colorscheme=light&show_faces=true&border_color&stream=false&header=false&" style="border:none; overflow:hidden; width:292px; height:258px;" >

            Replace my facebook page URL  with your page URL, Change Width And Height According To Your Template.

            4. Now save and you are done.


            • Floating facebook like box for Blogger
            Floating Facebook Like Box for Blogger

            Now I came up with new tutorial for adding floating like box to blogger.

            • Adding Jquery Plugin
            1. Go To Dashboard > Template > Edit HTML
            2. Search for </head> teg in your template and just below it paste the following JQuery code (You can ignore this step if Jquery Link is already added in your template)

            <script src='https://ajax.googleapis.com/ajax/libs/jquery/1.6.1/jquery.min.js' type='text/javascript'/>

            • Adding Widget Code
            1. Go to Layout > Add A Gadget
            2. Select HTML/Javascript
            3. Paste the following code inside it,

            <script type="text/javascript">
             //<!--
             $(document).ready(function() {$(".w2bslikebox").hover(function() {$(this).stop().animate({right: "0"}, "medium");}, function() {$(this).stop().animate({right: "-250"}, "medium");}, 500);});
             //-->
             </script> <style type="text/css"> .w2bslikebox{background: url("https://blogger.googleusercontent.com/img/b/R29vZ2xl/AVvXsEjC4Iw2mNf9Gzeb_rhDYg5xNCPTBnuzj2-xfVfnGdf17hABLn7N1iASHIgdpfWj8z8cA0-X145DUxF8scNjZ3EyQ-Djhgjqhp7HVSQUP5PIrycYD8eYEDCSXaFjQ4eGdH7LNBvSXxCSpoGw/s1600/FloatingFB.png") no-repeat scroll left center transparent !important;display: block;float: right;height: 300px;padding: 0 5px 0 46px;width: 245px;z-index: 99999;position:fixed;right:-250px;top:20%;} .w2bslikebox div{border:none;position:relative;display:block;} .w2bslikebox span{bottom: 12px;font: 8px "lucida grande",tahoma,verdana,arial,sans-serif;position: absolute;right: 6px;text-align: right;z-index: 99999;} .w2bslikebox span a{color: #808080;text-decoration:none;} .w2bslikebox span a:hover{text-decoration:underline;} </style><div class="w2bslikebox" style=""><div>
             <iframe src="http://www.facebook.com/plugins/likebox.php?href=http%3A%2F%2Ffacebook.com%2Fpages/ThingsGuide/281417998619583&amp;width=245&amp;colorscheme=light&amp;show_faces=true&amp; connections=9&amp;stream=false&amp;header=false&amp;height=292" scrolling="no" frameborder="0" scrolling="no" style="border: medium none; overflow: hidden; height: 292px; width: 245px;background:#fff;"></iframe><span><a style="font-family: arial, sans-serif; font-size: 9px; color: #999;" href="http://www.jobsmag.in" target="_blank"> JM</a></span> </div> </div>

            4. Replace pages/ThingsGuide/281417998619583 with your Facebook fan page URL.
            5. Now save your template and you are all done!

            Visit your Blogs to see it floating at the right side of your webpage.

            Updated - 2 New Awesome Style of Facebook Like Box For blogger or Website

            Thứ Hai, 16 tháng 7, 2012

            How to Remove or Customize Blogger Attribution Widget

            If you are using a template by Blogger Template Designer, All of them have an attribution at the bottom of the blog. by default, Blogger templates include attribution gadget at the bottom of each template. The Attribution gadget is the gadget in the footer that says "Powered By Blogger". If you have tried to remove this then you may noticed that gadget is locked and you are able to modify only the "Copyright" statement from the widget.
            Remove blogger footer attribution

            Most of  the blogger dislike it and ask are they allowed to remove this from their template? The answer is yes you are allowed! Follow my instructions below if you wish to remove or customize blogger attribution widget.

            Steps :
            Important Notice : Always Back Up Your Templates before Making Any Changes On it.
            1. Go to Design > Edit HTML
            2. Expand your Widget Template.
            3. Click Ctrl+F for the browser Find bar to pop up.
            4. Search for the code below in your template.

            <b:widget id='Attribution1' locked='true' title='' type='Attribution'>

            5. Now change the locked value 'true' to 'false' in the line of code.

            <b:widget id='Attribution1' locked='false' title='' type='Attribution'>

            6. Now find the code similar below,

            <b:section class='foot' id='footer-3' showaddelement='no'>

            7. Now change attribute value showaddelement no to yes as below,

            <b:section class='foot' id='footer-3' showaddelement='yes'>

            8. Save your template.
            9. Go back and navigate to Layout tab.
            10. Find Attribution element bottom of your page.

            11. Click on Edit
            12.  Now click on Remove button.

            Now Attribution element has been removed. You can add another element using bottom Add a Gadget link to add custom attribution.

            Enjoy...waiting for your comments.

            Thứ Năm, 29 tháng 12, 2011

            Recommended Post Slider Widget for Blogger with Twitter / Facebook share button

            In this post I have an awesome new gadget that can be seen Wordpress blogs is now available for Blogger.Recommended post slider in each post is interesting widget.Those of you who follow some Wordpress blogs have seen the recommended or related posts slider.You may have seen this type of widget in many popular websites like The New York Times, Mashable, Times of India, etc.The widget is originally developed by bloggerplugins, i just changed something in the widget.It keeps readers to read more pages of your blog.


            How to Install Recommended Post Slider Widget for Blogger with Facebook,Twitter share button


            I have to write two set of instructions for each steps, as some of you are using the default layout, and some of you are using the new layout. So, let's see how to install this cool widget in your blog..

            Step 1:

            If you're using the old Blogger interface: Go to Dashboard - Design - Page Elements - Add a Gadget.

            Add a Gadget of HTML/JavaScript type.

            If you're using the new Blogger interface: Go to Dashboard - Layout - Add a Gadget


            2.Click on 'Add a Gadget' on the sidebar.

            3.Select 'HTML/Javascript' and add the one of code given below

            4. Now Click On Save 'JavaScript' You are done.


            <a href="http://24work.blogspot.com" target="_blank" title="Blogger Widgets"><img src="https://bitly.com/24workpng1" border="0" alt="Blogger Widgets" style="position:absolute; top: 0px; right: 0px;" /></a><style type="text/css">#recslide{z-index:5;width:400px;height:100px;padding:10px;background-color:#fff;border-top:3px solid #000;position:fixed;right:-430px;bottom:0;-moz-box-shadow:-2px 0 5px #aaa;-webkit-box-shadow:-2px 0 5px #aaa;box-shadow:-6px -5px 5px #aaa; font-family:Arial, Helvetica, sans-serif;}#recslide p{font-size:11px;text-transform:uppercase;font-family:Arial,Helvetica,sans-serif;letter-spacing:1px;color:#000; font-weight: bold;}#recslide_title{color:#555;font-weight:700;font-size:16px;margin:10px 20px 10px 0;}#recslide a,#recslide a:hover,#recslide_title{text-decoration:none;color:#FE3F10; padding: 5px 5px 5px 2px;}#recslide .close,#recslide .expand,#recslide .help{border:2px solid #EEE;cursor:pointer;color:#9A9AA1;width:13px;height:15px;padding:2px 0 0 5px;position:absolute;right:10px;font-size:17px;font-weight:700;font-family:Arial, Helvetica, sans-serif;font-size:12px;}#recslide .help{right:35px;}#recslide_image{float:left;width:80px;}#recslide_title{width:287px;height:30px;overflow:hidden;}</style><div id="recslide" style="display:none;"> <div class="help">?</div><div class="expand">+</div> <div class="close">X</div> <p>Recommended for you</p><div id="recslide_image"></div><div id="recslide_title">Loading..</div><center><div id="share_box">loading</div></center></div><script> if(document.location.href.split("/").length==6&&document.location.href.indexOf(".html")!=-1){if(typeof bts_onload_queue=='undefined')var bts_onload_queue=[];if(typeof bts_dom_loaded=='boolean')bts_dom_loaded=false;else var bts_dom_loaded=false;if(typeof bts_async_loader!='function'){function bts_async_loader(src,callback,id){var script=document.createElement('script');script.type="text/javascript";script.async=true;script.src=src;script.id=id;var previous_script=document.getElementById(id);if(previous_script)if(previous_script.readyState=="loaded"||previous_script.readyState=="complete"){callback();return}else{script=previous_script}if(script.onload!=null)previous_callback=script.onload;script.onload=script.onreadystatechange=function(){var newcallback;if(previous_script&&previous_callback)newcallback=function(){previous_callback();callback()};else newcallback=callback;if(bts_dom_loaded){newcallback()}else bts_onload_queue.push(newcallback);script.onload=null;script.onreadystatechange=null};var head=document.getElementsByTagName('head')[0];if(!previous_script)head.appendChild(script)}}if(typeof bts_domLoaded!='function')function bts_domLoaded(callback){bts_dom_loaded=true;var len=bts_onload_queue.length;for(var i=0;i<len;i++){bts_onload_queue[i]()}}bts_domLoaded();bts_async_loader("http://ajax.googleapis.com/ajax/libs/jquery/1.7.1/jquery.min.js",function(){bts_async_loader("http://24work-new.googlecode.com/svn/trunk/24work-blogspot/recommended/recommended-Slide-v1.0.js",function(){},"bts-out-slide")},"jQueryjs")}</script>

            And now click Save


            Optionally use this Widget installer to add this link to your blogger blog.


            Click the following image to add the widget to your blogger:


            And now click Save


            if you want slide come out whenever you reach the end of post, then follow this instruction:


            Adding Recommended post slider widget below posts


            I have seen few who are showing the Recommended post slider of posts below their posts. It’s also a good script placement which can increase your pageviews.

            To add the code , just follow the above instructions.


            I have to write two set of instructions for each steps, as some of you are using the default layout, and some of you are using the new layout.Backup your template before attempting this tutorial.

            Step 1:

            In old layout: Go to Dashboard - Design - Edit HTML - Expand Widget Templates.


            In new layout: Go to Dashboard - Template - Edit Template HTML - Expand Widget Templates.


            Now find (CTRL+F) this code in the template:

            <data:post.body/>
            or
            <div class='post-footer-line post-footer-line-1'>
            or
            <p class='post-footer-line post-footer-line-1'>

            Immediately below any of these, add the following code and save Template:

            <b:if cond='data:blog.pageType == "item"'>

            <div style='display:none' id='recslide_place_holder'></div>

            </b:if>


            Now you can see a beautiful Recommended post slider appearing below the posts in your Blog.


            How to Install Recommended Post Slider Widget for Blogger


            So, let's see how to install this cool widget in your blog..

            1. Sign into Blogger dashboard

            old Blogger interface: Go to Dashboard - Design - Page Elements - Add a Gadget.If you're using the new Blogger interface: Go to Dashboard - Layout - Add a Gadget.Select 'HTML/Javascript' and add the one of code given below.Just copy and paste this code..


            <a href="http://24work.blogspot.com" target="_blank" title="Blogger Widgets"><img src="https://bitly.com/24workpng1" border="0" alt="Blogger Widgets" style="position:absolute; top: 0px; right: 0px;" /></a><div id="bpslidein" style="display:none;"> <div class="help">?</div><div class="expand">+</div> <div class="close">X</div> <p>Recommended for you</p> <div id="bpslidein_image"></div> <div id="bpslidein_title">Loading..</div> </div> <script> if(document.location.href.split("/").length==6&&document.location.href.indexOf(".html")!=-1){if(typeof bp_onload_queue=='undefined')var bp_onload_queue=[];if(typeof bp_dom_loaded=='boolean')bp_dom_loaded=false;else var bp_dom_loaded=false;if(typeof bp_async_loader!='function'){function bp_async_loader(src,callback,id){var script=document.createElement('script');script.type="text/javascript";script.async=true;script.src=src;script.id=id;var previous_script=document.getElementById(id);if(previous_script)if(previous_script.readyState=="loaded"||previous_script.readyState=="complete"){callback();return}else{script=previous_script}if(script.onload!=null)previous_callback=script.onload;script.onload=script.onreadystatechange=function(){var newcallback;if(previous_script&&previous_callback)newcallback=function(){previous_callback();callback()};else newcallback=callback;if(bp_dom_loaded){newcallback()}else bp_onload_queue.push(newcallback);script.onload=null;script.onreadystatechange=null};var head=document.getElementsByTagName('head')[0];if(!previous_script)head.appendChild(script)}}if(typeof bp_domLoaded!='function')function bp_domLoaded(callback){bp_dom_loaded=true;var len=bp_onload_queue.length;for(var i=0;i<len;i++){bp_onload_queue[i]()}}bp_domLoaded();bp_async_loader("http://ajax.googleapis.com/ajax/libs/jquery/1.7.1/jquery.min.js",function(){bp_async_loader("http://24work-new.googlecode.com/svn/trunk/24work-blogspot/recommended/bp-out-slide.min.js",function(){},"bp-out-slide")},"jQueryjs")} </script>


            And now click Save


            Optionally use this Widget installer to add this link to your blogger blog.


            Click the following image to add the widget to your blogger:


            And now click Save


            if you want slide come out whenever you reach the end of post, then follow this instruction:


            Adding Recommended post slider widget below posts

            In old layout: Go to Dashboard - Design - Edit HTML - Expand Widget Templates.

            In new layout: Go to Dashboard - Template - Edit Template HTML - Expand Widget Templates.


            Now find (CTRL+F) this code in the template:

            <data:post.body/>
            or
            <div class='post-footer-line post-footer-line-1'>
            or
            <p class='post-footer-line post-footer-line-1'>

            Immediately below any of these, add the following code and save Template:


            <b:if cond='data:blog.pageType == "item"'>
            <div style='display:none' id='bpslidein_place_holder'></div>
            </b:if>

            Now you can see a beautiful Recommended post slider appearing below the posts in your Blog.


            Many thanks to breakthesecurity or bloggerplugins for making this code and I just tested and modified to work on blogger